Orchestrating Robots using UiPath
One of the most widely used tools on the RPA market is UiPath. To assure scalability and dependability, this application includes drag-and-drop capabilities to automate repeated activities without human interaction. Learn how the whole digital workforce can be controlled and managed in one location in this article on UiPath Orchestrator. Enhance your RPA skills by learning in our UiPath Training in Chennai at Softlogic Systems.
What is UiPath?
Robotic process automation software called UiPath is mostly used for Windows desktop automation. This application offers a Community Edition that uses the Drag & Drop features and is free forever.The UiPath Enterprise Platform, UiPath Studio, UiPath Robots, and UiPath Orchestrator are just a few of the products that UiPath offers to meet our demands.
Orchestrator in UiPath
UiPath’s Orchestrator solution enables you to direct UiPath robots to continually carry out repetitive tasks on numerous platforms.The orchestrator performs the following steps:
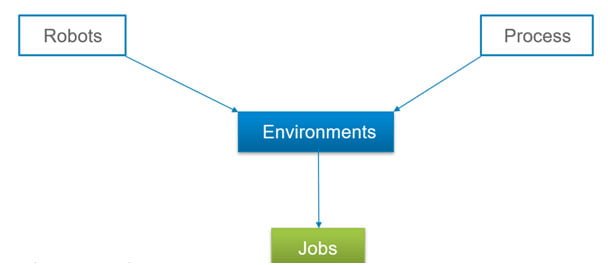
To begin, you must build the robots that will carry out your work. Then, in order to use it as a process, you must establish a Project and publish it. Once a process has been created, a robot must be assigned to carry it out in a particular setting, which results in the creation of a Job.
Therefore, you must log into the orchestrator first in order to have your orchestrator do all of the aforementioned operations. Let’s investigate the same.
Login to UiPath Orchestrator
To become a Tenant and register yourself with UiPath Orchestrator, please follow the procedures listed below.
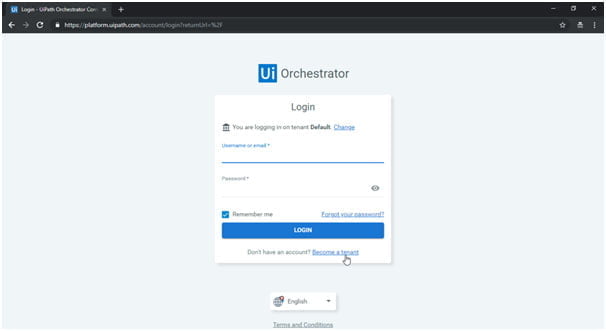
Step 1: Go to https://platform.uipath.com/ and select “Become a Tenant”. Look at the below image.
Step 2: After selecting the choice, the registration page will be displayed. You must provide the tenant’s name, username, first and last name, email address, and admin password, and confirm the password in this field. Next, click Create the Tenant after accepting the terms of the agreement. See the illustration below.

Step 3: Return to the Login Page after becoming a Tenant and enter your Username and Password. Afterward, select Login. Your Orchestrator will be logged in at this phase.
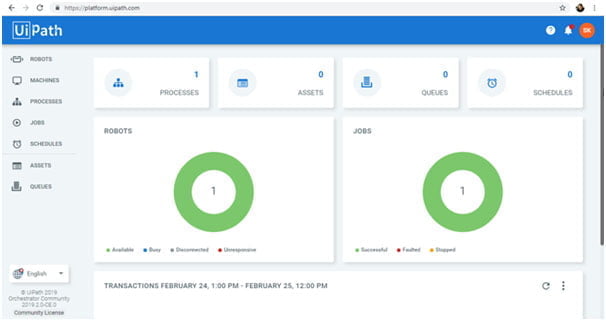
You will view the dashboard after logging into your Orchestrator account. This dashboard has a number of options that you can use to build and learn about processes, queues, machines, jobs, etc.Let me now demonstrate how to set up robots, processes, environments, and tasks in UiPath’s Orchestrator after explaining how to log in.
Tips to create Robots, Environments, Processes, and Jobs
Let’s take a look at an example project where we ask a user for information and then show the information in a message box to better understand how Orchestrator functions.In the Process part, we will demonstrate how to establish this automation job for you. But first, let us demonstrate how to install a machine. After that, we’ll make a robot.
Steps to add a machine in Orchestrator
Go to the Machines Tab and select the “+” button to construct a machine. The following three choices appear when you select the Plus option:
- A solution for building a standalone machine
- Creating a Floating Machine Template option.
- An Option to Close
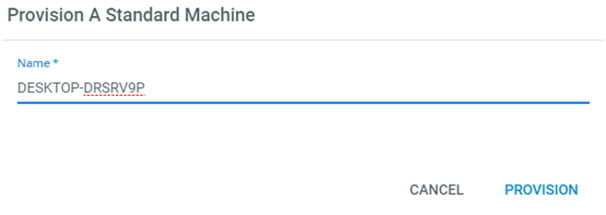
Depending on your needs, you can develop one of the two solutions mentioned above. We are going to build a standalone machine here.You must include the machine name in order to add your machine. Go to My Computer’s Properties to find out your machine name; it will be shown there as your computer name. To add your computer, click Provision after that.
The following step is to generate Robots after adding your Machine to Orchestrator. Let’s go on in this post and examine how to build robots.
Tips to create Robots in Orchestrator
Go to the Robots Tab and select the “+” button to build more robots. The following three choices appear when you select the Plus option:
- A solution for building a standalone robot. This robot will only operate on one common machine.
- An ability to build a floating robot. This robot can operate any type of machine.
- An option to close
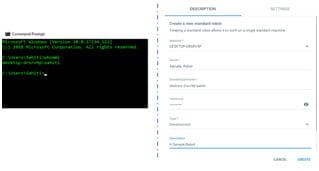
Depending on your needs, you may opt to design any kind of robot. In this case, I’ll be building a standalone robot.The Machine Name, Name, Domain Name, Password, Choose Type, and Description must all be specified after the option to build a Standalone robot is selected. Next, choose to Create.
NOTE: You may enter the command “whoami” at the Command Prompt to find out the Domain Name. Look below.
Your robot will result from this. Enabling UI Robot is the following action.
You must activate UI Robot because it is not set to be enabled by default. You must browse to the directory where UiPath has been installed in order to enable the UI Robot. Double-click the UI Robot after that.
The UI Robot will be enabled by the action above. The robot must now be turned on at the following stage.
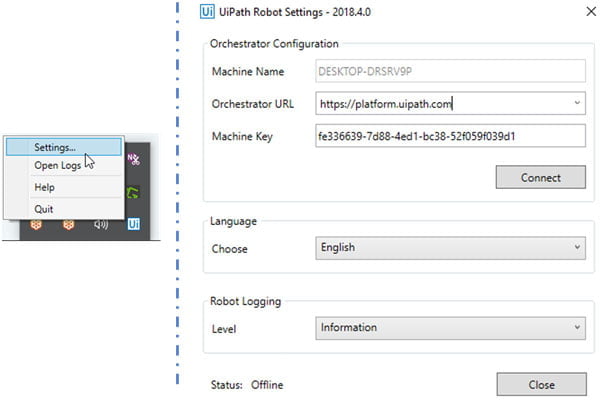
You must first go to Settings after right-clicking the UI Robot icon to activate your robot.
Right-clicking the UI Robot sign and then selecting Settings will enable your robot.
Mention the Machine Key and Orchestrator URL in the UI Robot’s settings. Click Connect after that. Your UI Robot will then be activated. the following.
Go to https://platform.uipath.com/robots to see the status as Available if you want to know if your robot is available or not. Look below.

NOTE: The UI Robot feature is not always active. You must browse to the directory where UiPath has been installed in order to enable the UI Robot. Double-click the UI Robot after that.Your robot is now ready;thus, the following step is to design an environment
How does Orchestrator generate an environment?
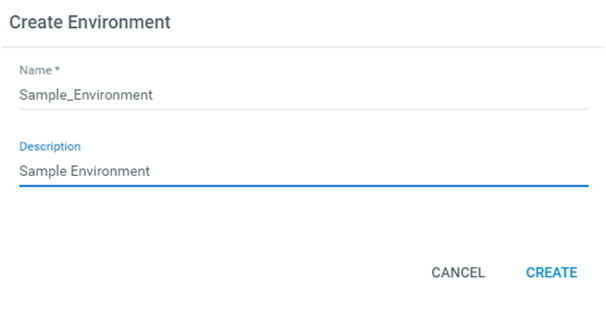
Go to the Environments Tab and select the “+” button to construct robots. The dialogue box to build an environment will appear when you select the Plus option. Click on Create after entering the Name and Description as shown below.
Once you click Create, another Dialog Box will appear where you must choose the Robot that will carry out duties in the newly formed environment. Next, choose Update.
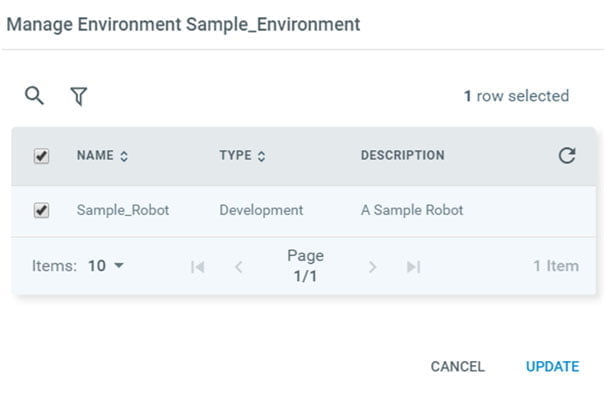
Your Environment will be created as a result. The next step is to construct a Process after you have built an Environment.
How may a process be created in Orchestrator?
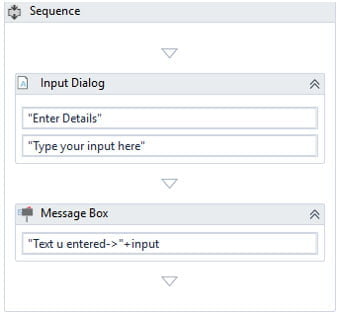
You must first build a project in the UiPath Studio and then publish it in order to establish a Process in Orchestrator. Let’s take a project where we ask the user for information and then show the information in a message box as an example of how to achieve it. Refer the following list for the order.
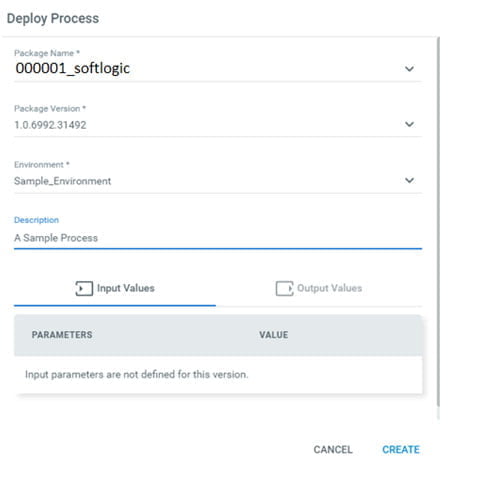
The following step is to build a Process after your project has been published.Go to the Process Tab and select “+” to add a new process. You will get the following dialogue box to create a Process when you select the Plus option. Mention these things:
- Package Name (Project Name)
- Package Version
- Environment
- Description
How can jobs be created in Orchestrator?
You must click the play button in Orchestrator in order to create a Job. Following that, you must specify the Process for which you wish to plan a Job and select the robot who will carry out the action. Click Start after that.
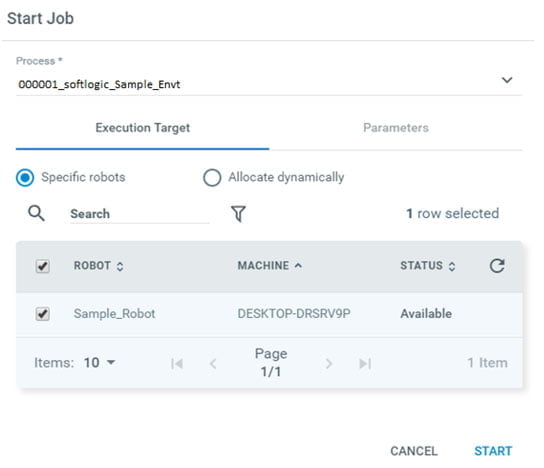
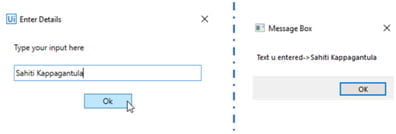
When you click Start, your Job will immediately begin running automatically. We must indicate the input in the dialogue box here, and the outcome of that input can be seen in the message box.
Your job will be marked as successful after it has been executed. Look below.

Conclusion
Hope this article helps you understand how UiPath Orchestrating Robots. Learn UiPath Course in Chennai at Softlogic Systems with Hands-on exposure.