
The demand for Mobile App Development with Android is increasing rapidly and it creates tremendous career opportunities for beginners, intermediates, and experienced people.
We have come up with top Android Projects that are must-try for 2022. They all have unique values in interviews as well as hands-on exposure.
Learn the best Android Training in Chennai to become a master in Android Mobile Application Development.
What is Android?
Android is the popular Linux-based operating system offered by Google and it is designed for touch screen capabilities in mobile phones and tablets.
It is an open-source operating system that helps in understanding easily the features of android such as wallpapers, themes, and widgets.
Android is developed by OHA (Open Handset Alliance ), a consortium of multiple computers like Sony, Samsung, Intel, and so on for providing services and deploying handsets using Android OS.
Important Android Projects
The learning of Android Development doesn’t go well without implementing it in real-time project development.
It provides you the knowledge of how to code from scratch, how to implement tools, libraries, and frameworks, and how to deploy efficiently as per the expectation of global customers.
Project 1: Simple Demo Project
It is a beginner-level project that helps you know how to develop an application from scratch. Start with an IDE – Android Studio and it will help you develop any android applications.
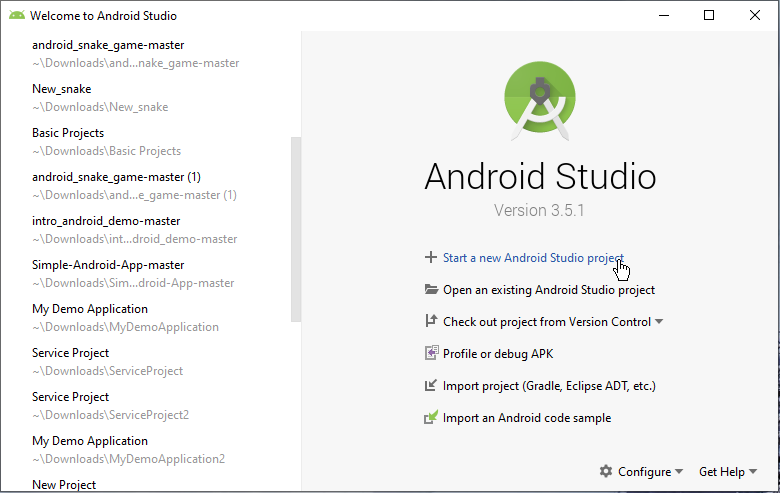
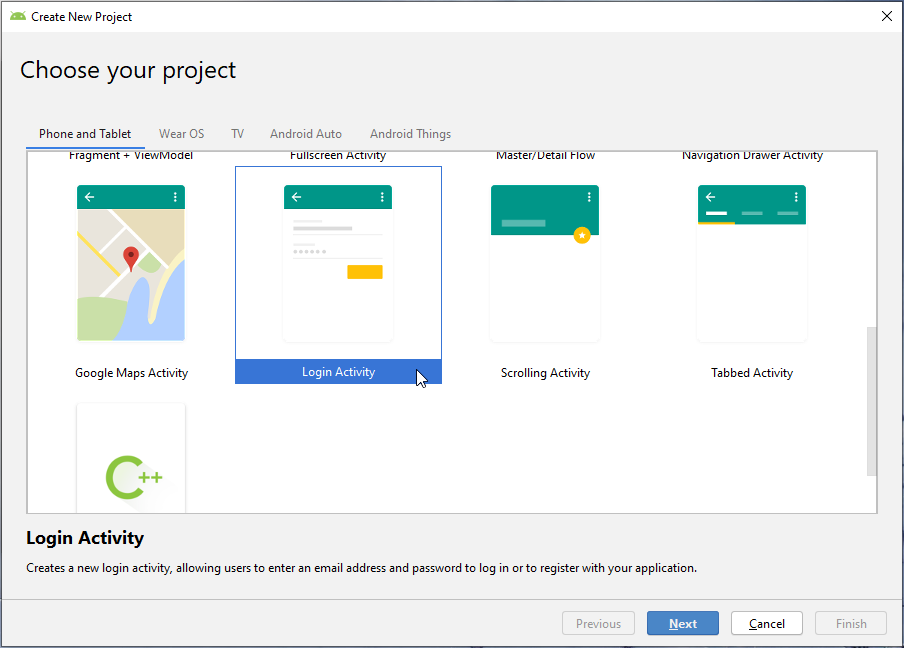
Choose a project from the options. Now, we select Login Project
Now, give a name to the project and select the programming language. Here, we use Kotlin for this project.
Then, select a virtual device using AVD Manager and click on create a virtual device. Now, you’ll get a list of devices. You can choose a normal phone to work on.
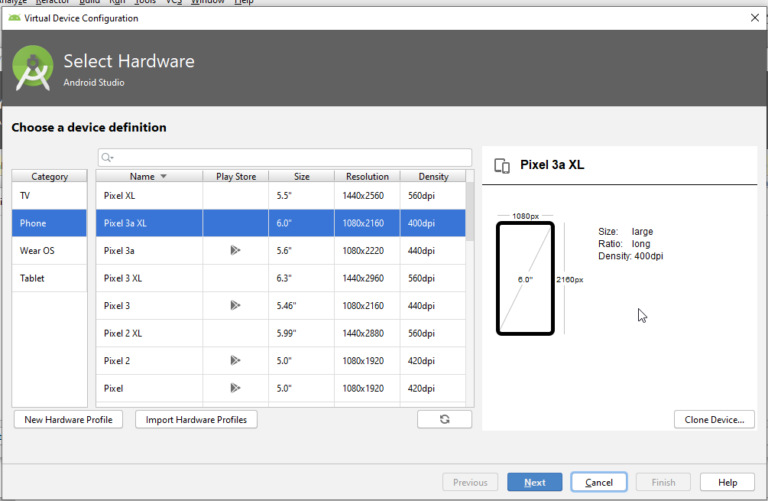
It is important to enabling BIOS for the selected device
Now, under the Java folder, we can find the required classes. Just edit them as per your needs.
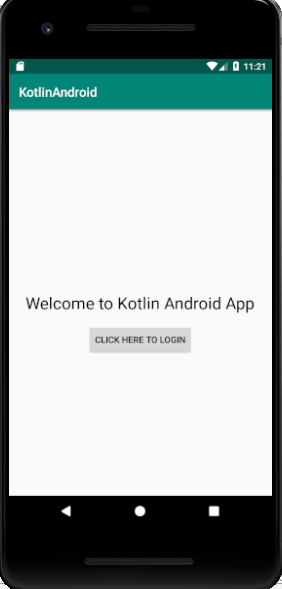
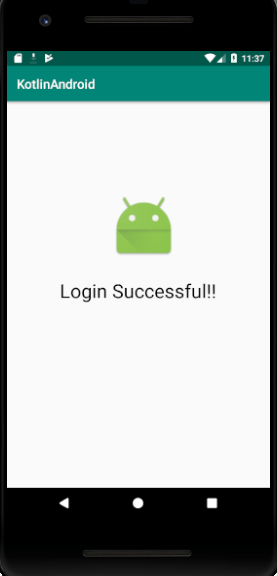
Here, we have created a login android application and it shows the first screen, and welcome page as follows
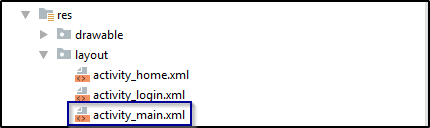
Now, configure the layout to create and design the screen. You must open the layout folder and double-click on activity_main.xml as follows
When you open the XML file, you have to create the elements as per the structure we want on our screen. You must open the design tab and drag and drop buttons into your screen before creating the required elements as below
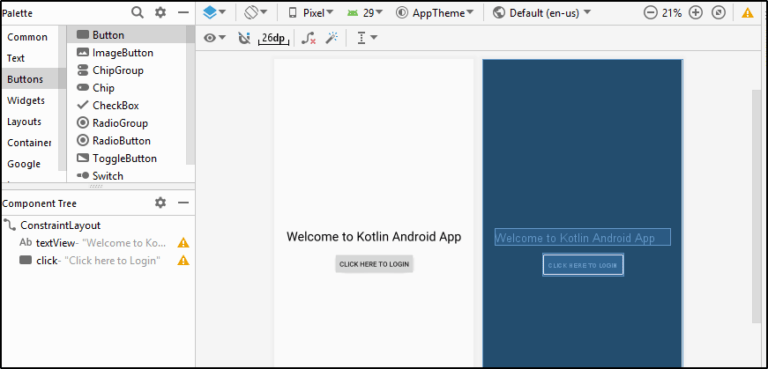
Now, open the activity_main.xml file and configure it with elements with the following codes.
<?xml version=”1.0″ encoding=”utf-8″?> <androidx.constraintlayout.widget.ConstraintLayout xmlns:android=”<a href=”http://schemas.android.com/apk/res/android”><a href=”http://schemas.android.com/apk/res/android</a”>http://schemas.android.com/apk/res/android</a</a>>” xmlns:tools=”<a href=”<a href=”http://schemas.android.com/tools”>http://schemas.android.com/tools</a>”><a href=”http://schemas.android.com/tools</a”>http://schemas.android.com/tools</a</a>>” xmlns:app=”<a href=”<a href=”http://schemas.android.com/apk/res-auto”>http://schemas.android.com/apk/res-auto</a>”><a href=”http://schemas.android.com/apk/res-auto</a”>http://schemas.android.com/apk/res-auto</a</a>>” android:layout_width=”match_parent” android:layout_height=”match_parent” tools:context=”.MainActivity”
<TextView android:layout_width=”wrap_content” android:layout_height=”wrap_content” android:text=”Welcome to Kotlin Android App” android:textSize=”26sp” android:textColor=”#000000″ app:layout_constraintBottom_toBottomOf=”parent” app:layout_constraintLeft_toLeftOf=”parent” app:layout_constraintRight_toRightOf=”parent” app:layout_constraintTop_toTopOf=”parent” android:id=”@+id/textView”/>
<Button android:text=”Click here to Login” android:layout_width=”wrap_content” android:layout_height=”wrap_content” android:id=”@+id/click” android:layout_marginTop=”16dp” app:layout_constraintTop_toBottomOf=”@+id/textView” android:layout_marginEnd=”96dp” android:layout_marginRight=”96dp” app:layout_constraintEnd_toEndOf=”@+id/textView”/>
</androidx.constraintlayout.widget.ConstraintLayout>
After you have typed the codes, you have to create a Kotlin Class file to add the listeners for calling the actions from the activity_main.xml file. Follow the below codes and create a file
package com.example.kotlinandroid
import android.content.Intent
import androidx.appcompat.app.AppCompatActivity
import android.os.Bundle
import android.widget.Button
import android.widget.Toast
class MainActivity : AppCompatActivity() {
override fun onCreate(savedInstanceState: Bundle?) {
super.onCreate(savedInstanceState)
setContentView(R.layout.activity_main)
val but_click=findViewById<Button>(R.id.click)
but_click.setOnClickListener{
val intent = Intent(this, login::class.java)
startActivity(intent)
}
}
}
Now, the welcome page is created completely. Next, create a login screen for entering the email address and password as follows.
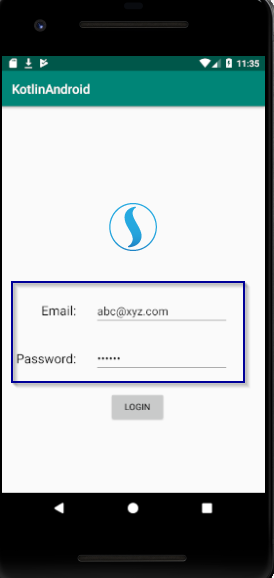
Now, you need to create the design layout as per the image in the My Design Tab of the second activity which is named activity_login.xml as follows
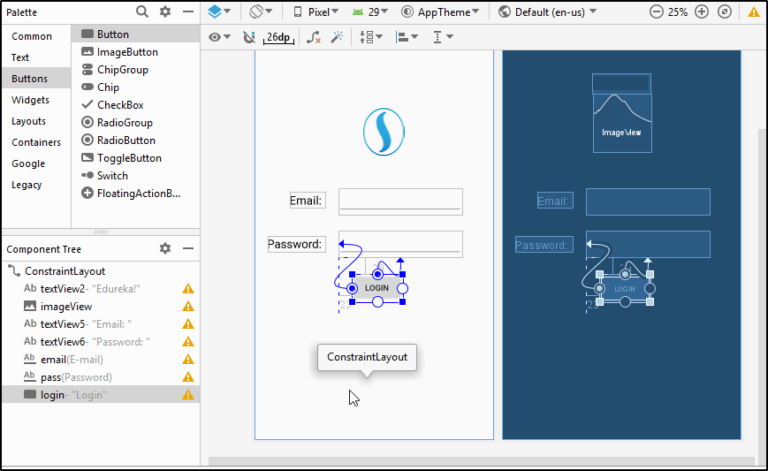
Now, configure the activity_login.xml file with the codes below
<?xml version=”1.0″ encoding=”utf-8″?> <androidx.constraintlayout.widget.ConstraintLayout
xmlns:android=”<a href=”http://schemas.android.com/apk/res/android”><a href=”http://schemas.android.com/apk/res/android</a”>http://schemas.android.com/apk/res/android</a</a>>”
xmlns:tools=”<a href=”http://schemas.android.com/tools”><a href=”http://schemas.android.com/tools</a”>http://schemas.android.com/tools</a</a>>”
xmlns:app=”<a href=”http://schemas.android.com/apk/res-auto”><a href=”http://schemas.android.com/apk/res-auto</a”>http://schemas.android.com/apk/res-auto</a</a>>”
android:layout_width=”match_parent”
android:layout_height=”match_parent”
tools:context=”.login”>
<TextView android:text=”Password: ”
android:textSize=”20sp”
android:textColor=”#000000″
android:layout_width=”wrap_content”
android:layout_height=”wrap_content”
app:layout_constraintStart_toStartOf=”parent”
android:layout_marginTop=”144dp”
android:layout_marginLeft=”6dp”
android:layout_marginStart=”6dp”
app:layout_constraintTop_toBottomOf=”@+id/imageView”
android:id=”@+id/textView6″
app:layout_constraintHorizontal_chainStyle=”packed”
app:layout_constraintEnd_toStartOf=”@+id/pass”
android:layout_marginEnd=”24dp”
android:layout_marginRight=”24dp”
app:layout_constraintHorizontal_bias=”1.0″/>
<EditText android:layout_width=”wrap_content”
android:layout_height=”wrap_content”
android:inputType=”textEmailAddress”
android:ems=”10″
android:id=”@+id/email”
app:layout_constraintBaseline_toBaselineOf=”@+id/textView5″
app:layout_constraintStart_toEndOf=”@+id/textView5″
app:layout_constraintEnd_toEndOf=”parent”/>
<EditText android:layout_width=”wrap_content”
android:layout_height=”wrap_content”
android:inputType=”textPassword”
android:ems=”10″
android:id=”@+id/pass”
app:layout_constraintStart_toStartOf=”@+id/email”
android:layout_marginTop=”29dp”
app:layout_constraintTop_toBottomOf=”@+id/email”/>
<Button android:text=”Login”
android:layout_width=”wrap_content”
android:layout_height=”wrap_content”
android:id=”@+id/login”
app:layout_constraintStart_toStartOf=”@+id/pass”
android:layout_marginTop=”29dp”
android:layout_marginLeft=”23dp”
android:layout_marginStart=”23dp”
app:layout_constraintTop_toBottomOf=”@+id/pass”/>
</androidx.constraintlayout.widget.ConstraintLayout>
Finally, we can login to the application
Now, we have to create a Kotlin class file to add the listeners for calling the actions from the XML file. Then you can check the created screens by running the project.
Project 2: To-Do Task
This is an intermediate project in that you can create tasks and add a reminder to the created tasks. This project is designed with Java. Now, write the main class as follows
package src=”https://www.softlogicsys.in/wp-content/uploads/2022/07/Start-with-IDE.png”ialtodo.Man;
<span>import </span>android.content.Intent;
<span>import </span>android.os.Bundle;
<span>import </span>android.support.annotation.<span>NonNull</span>;
<span>import </span>android.support.v4.app.Fragment;
<span>import </span>android.support.v7.app.ActionBar;
<span>import </span>android.view.Menu;
<span>import </span>android.view.MenuItem;
<ssrc=”https://www.softlogicsys.in/wp-content/uploads/2022/07/Start-with-IDE.png”taltodo.About.AboutActiviy;
<ssrc=”https://www.softlogicsys.in/wp-content/uploads/2022/07/Start-with-IDE.png”taltodo.AppDefault.AppDefaultActiviy;
<ssrc=”https://www.softlogicsys.in/wp-content/uploads/2022/07/Start-with-IDE.png”.altodoR;
<ssrc=”https://www.softlogicsys.in/wp-content/uploads/2022/07/Start-with-IDE.png”taltodo.Settings.SettingsActiviy;
<span>public class </span>MainActivity <span>extends </span>AppDefaultActivity {
<span>protected void </span>onCreate(Bundle savedInstanceState) {
<span>super</span>.onCreate(savedInstanceState);
<span>final </span>android.support.v7.widget.Toolbar toolbar = (android.support.v7.widget.Toolbar) findViewById(R.id.<span>toolbar</span>);
setSupportActionBar(toolbar);
ActionBar actionBar = getSupportActionBar();
<span>if </span>(actionBar != <span>null</span>) {
actionBar.setDisplayHomeAsUpEnabled(<span>false</span>);
}
}
<span>@Override
</span><span> </span><span>protected int </span>contentViewLayoutRes() {
<span>return </span>R.layout.<span>activity_main</span>;
}
<span>@NonNull
</span><span> @Override
</span><span> </span><span>protected </span>Fragment createInitialFragment() {
<span>return </span>MainFragment.<span>newInstance</span>();
}
<span>@Override
</span><span> </span><span>public boolean </span>onCreateOptionsMenu(Menu menu) {
getMenuInflater().inflate(R.menu.<span>menu_main</span>, menu);
<span>return true</span>;
}
<span>@Override
</span><span> </span><span>public boolean </span>onOptionsItemSelected(MenuItem item) {
<span>switch </span>(item.getItemId()) {
<span>case </span>R.id.<span>aboutMeMenuItem</span>:
Intent i = <span>new </span>Intent(<span>this</span>, AboutActivity.<span>class</span>);
startActivity(i);
<span>return true</span>;
<span>// case R.id.switch_themes:
</span><span>// if(mTheme == R.style.CustomStyle_DarkTheme){
</span><span>// addThemeToSharedPreferences(LIGHTTHEME);
</span><span>// }
</span><span>// else{
</span><span>// addThemeToSharedPreferences(DARKTHEME);
</span><span>// }
</span><span>//
</span><span>//// if(mTheme == R.style.CustomStyle_DarkTheme){
</span><span>//// mTheme = R.style.CustomStyle_LightTheme;
</span><span>//// }
</span><span>//// else{
</span><span>//// mTheme = R.style.CustomStyle_DarkTheme;
</span><span>//// }
</span><span>// this.recreate();
</span><span>// return true;
</span><span> </span><span>case </span>R.id.<span>preferences</span>:
Intent intent = <span>new </span>Intent(<span>this</span>, SettingsActivity.<span>class</span>);
startActivity(intent);
<span>return true</span>;
<span>default</span>:
<span>return super</span>.onOptionsItemSelected(item);
}
}
}
The output will be as follows
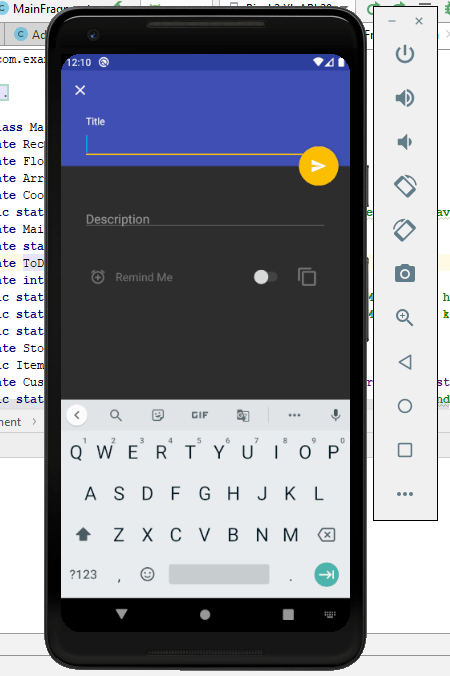
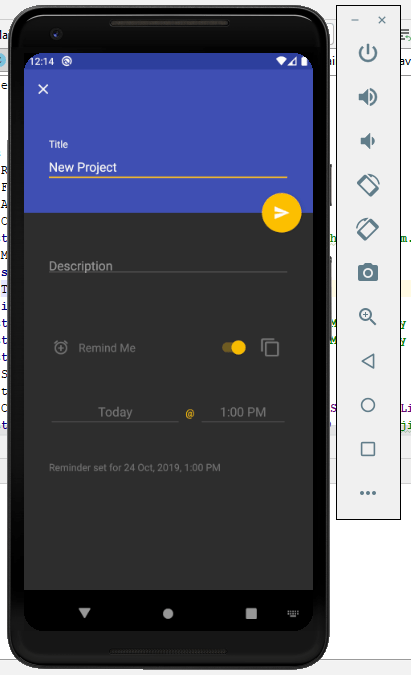
Now, we can add title for a task along with a reminder as follows
Project 3: Gaming Project
This is an advanced-level project used to create a gaming app and we create a snake game for Android.
- Create a board for running the app
- Create a node pointing to begin
- Add directions for indicating the path that snake to traverse.
Here is the main code for the snake game program in the Android
package </span>com.felipe.snake.game;
<span>import </span>java.util.LinkedList;
<span>import </span>com.felipe.snake.Direction;
<span>import </span>com.felipe.snake.Node;
<span>public class </span>Snake {
<span>private </span>LinkedList<Node> <span>body</span>;
<span>private int </span><span>endRow</span>;
<span>private int </span><span>endColumn</span>;
<span>private </span>Direction <span>direction</span>;
<span>public </span>Snake(<span>int </span>maxRows, <span>int </span>maxColumns) {
<span>this</span>.<span>endRow </span>= maxRows;
<span>this</span>.<span>endColumn </span>= maxColumns;
<span>this</span>.setBody(<span>new </span>LinkedList<Node>());
<span>this</span>.<span>direction </span>= Direction.<span>RIGHT</span>;
}
<span>public void </span>move(Direction direction) {
<span>if </span>(!validadeDirection(direction)) {
<span>return</span>;
}
Node head = getBody().getLast();
<span>for </span>(<span>int </span>i = <span>0</span>; i < <span>body</span>.size() – <span>1</span>; i++) {
Node nexNode = <span>body</span>.get(i + <span>1</span>);
Node node = <span>body</span>.get(i);
node.setRow(nexNode.getRow());
node.setColumn(nexNode.getColumn());
}
moveHead(direction, head);
<span>this</span>.<span>direction </span>= direction;
}
<span>public boolean </span>verify(<span>int </span>row, <span>int </span>column) {
<span>for </span>(Node node : <span>this</span>.getBody()) {
<span>if </span>(node.getRow() == row && node.getColumn() == column) {
<span>return true</span>;
}
}
<span>return false</span>;
}
<span>private void </span>moveHead(Direction direction, Node node) {
<span>if </span>(direction.equals(Direction.<span>LEFT</span>)) {
<span>if </span>(node.getColumn() == <span>0</span>) {
node.setColumn(<span>endColumn</span>);
} <span>else </span>{
node.setColumn(node.getColumn() – <span>1</span>);
}
} <span>else if </span>(direction.equals(Direction.<span>RIGHT</span>)) {
<span>if </span>(node.getColumn() == <span>endColumn</span>) {
node.setColumn(<span>0</span>);
} <span>else </span>{
node.setColumn(node.getColumn() + <span>1</span>);
}
} <span>else if </span>(direction.equals(Direction.<span>UP</span>)) {
<span>if </span>(node.getRow() == <span>0</span>) {
node.setRow(<span>endRow </span>- <span>1</span>);
} <span>else </span>{
node.setRow(node.getRow() – <span>1</span>);
}
} <span>else if </span>(direction.equals(Direction.<span>DOWN</span>)) {
<span>if </span>(node.getRow() == <span>endRow</span>) {
node.setRow(<span>0</span>);
} <span>else </span>{
node.setRow(node.getRow() + <span>1</span>);
}
}
}
<span>private boolean </span>validadeDirection(Direction direction) {
<span>if </span>(direction.equals(Direction.<span>LEFT</span>)
<span>this</span>.<span>direction</span>.equals(Direction.<span>RIGHT</span>)) {
<span>return false</span>;
}
<span>if </span>(direction.equals(Direction.<span>RIGHT</span>)
<span>this</span>.<span>direction</span>.equals(Direction.<span>LEFT</span>)) {
<span>return false</span>;
}
<span>if </span>(direction.equals(Direction.<span>UP</span>)
<span>this</span>.<span>direction</span>.equals(Direction.<span>DOWN</span>)) {
<span>return false</span>;
}
<span>if </span>(direction.equals(Direction.<span>DOWN</span>)
&& <span>this</span>.<span>direction</span>.equals(Direction.<span>LEFT</span>)) {
<span>return false</span>;
}
<span>return true</span>;
}
<span>public </span>LinkedList<Node> getBody() {
<span>return </span><span>body</span>;
}
<span>public void </span>setBody(LinkedList<Node> body) {
<span>this</span>.<span>body </span>= body;
}
}
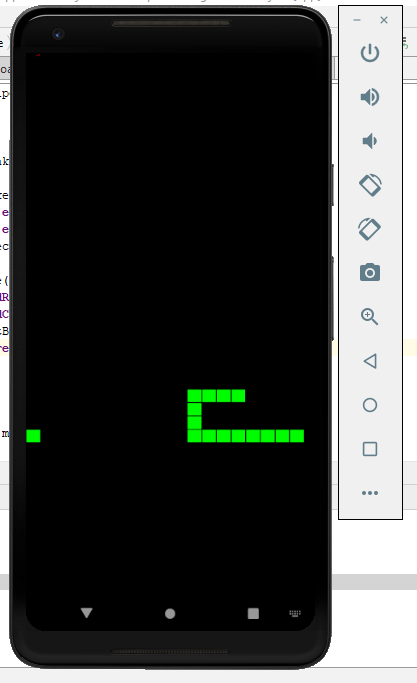
Output
Finally, we have created the snake game for Android.
Conclusion
We hope the three projects that have been covered in this blog will be useful for you to gain a fundamental understanding of Android Mobile App Development.
Learn the Best Android App Development Course in Chennai at Softlogic for enjoying the best practices on real-time projects.